Easy Steps: Adjusting The Brake On A Razor Scooter
Looking to adjust the brake on your Razor scooter? You’ve come to the right place! Keeping your scooter’s brake system in top-notch condition is crucial for safety and optimal performance. Fortunately, adjusting the brake on a Razor scooter is a simple process that you can easily master. In this article, we will guide you through the step-by-step process of adjusting the brake on your Razor scooter, ensuring a smooth and reliable ride every time. So, let’s get started on learning how to adjust the brake on a Razor scooter!

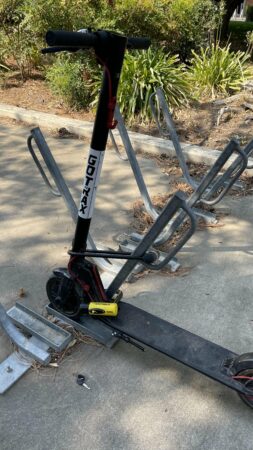
How do you adjust the brake on a Razor scooter?
When it comes to ensuring the safety and optimal performance of your Razor scooter, adjusting the brake is an essential maintenance task. A properly adjusted brake not only allows you to maintain control and stop efficiently but also enhances your overall riding experience. In this comprehensive guide, we will walk you through the step-by-step process of adjusting the brake on your Razor scooter, ensuring that you can confidently hit the road with peace of mind.
1. Reasons to Adjust the Brake
Before diving into the adjustment process, let’s understand why you might need to adjust the brake on your Razor scooter. Here are a few common reasons:
- The brake is loose and lacks responsiveness
- The brake is too tight, causing excessive friction or wheel lock
- The brake squeals or makes unusual noises when engaged
- You have installed new brake pads and need to fine-tune the adjustment
Addressing these issues will not only improve the performance of your scooter but also ensure your safety on the road.
2. Gather the Necessary Tools
Before you begin adjusting the brake, make sure you have the following tools readily available:
- Allen wrenches or a screwdriver (depending on your scooter model)
- Adjustable wrench
- Small pliers (optional)
These tools will enable you to access and adjust the various components of the brake system.
3. Identify the Brake System on Your Razor Scooter
Razor scooters can feature different types of brake systems, such as foot brakes, hand brakes, or a combination of both. It’s important to familiarize yourself with the brake system on your specific model before attempting any adjustments.
3.1 Foot Brake
If your scooter is equipped with a foot brake, it is typically located on the rear wheel. It consists of a brake pad that applies pressure on the wheel when engaged using your foot. Adjustments are made by manipulating the position of the brake pad or the tension on the cable.
3.2 Hand Brake
A hand brake, also known as a caliper brake, operates similarly to a bicycle brake. It consists of brake pads that squeeze against the wheel rim when the brake lever is activated. Adjustments are usually made by altering the cable tension or the position of the brake pads.
3.3 Combination Brake System
Some Razor scooter models feature a combination of foot and hand brakes. In these cases, you will need to adjust both systems independently to ensure optimal performance.
4. Adjusting a Foot Brake
To adjust the foot brake on your Razor scooter, follow these steps:
4.1 Loosen the Brake Cable
Start by locating the brake cable. It is usually connected to the foot brake mechanism near the rear wheel. Use an adjustable wrench or pliers to loosen the cable nut, releasing tension in the cable.
4.2 Adjust the Brake Pad Position
Once the cable is loose, adjust the position of the brake pad. You can usually do this by loosening the brake pad mounting bolt using an Allen wrench or a screwdriver. Slide the brake pad up or down until it is positioned correctly against the wheel rim.
4.3 Check Brake Pad Clearance
After adjusting the brake pad position, check the clearance between the brake pad and the wheel rim. There should be a small gap to prevent continuous friction. Adjust the position further if needed, ensuring the pad does not rub against the wheel when the brake is disengaged.
4.4 Tighten the Brake Cable
Once you are satisfied with the brake pad position, tighten the brake cable by turning the cable nut clockwise. Ensure that the cable is secure but not overly tight, allowing for smooth engagement and disengagement of the brake.
5. Adjusting a Hand Brake
If your Razor scooter is equipped with a hand brake, follow these steps to adjust it:
5.1 Locate the Brake Adjuster
Start by locating the brake adjuster barrel, which is usually located near the brake lever. It is a small cylindrical component with a threaded exterior.
5.2 Loosen the Brake Cable
Using an adjustable wrench or pliers, loosen the nut that secures the brake cable to the brake adjuster barrel. This will release the cable tension.
5.3 Adjust the Brake Pads
With the cable loose, adjust the position of the brake pads. This is typically done by manually pulling the brake lever and aligning the pads against the wheel rim. Ensure that the pads make uniform contact with the rim when engaged.
5.4 Check Brake Pad Clearance
After adjusting the brake pads, check the clearance between the pads and the wheel rim. Similar to the foot brake, there should be a small gap to avoid continuous friction. If necessary, adjust the position slightly to achieve the optimal clearance.
5.5 Tighten the Brake Cable
Finally, tighten the brake cable by turning the nut clockwise on the brake adjuster barrel. This will restore tension to the cable while maintaining the correct pad position.
6. Test and Fine-tune the Brake Adjustment
After completing the brake adjustment, take your Razor scooter for a test ride in a safe and open area. Pay attention to the responsiveness and effectiveness of the brake. If needed, make further adjustments to achieve the desired performance.
Remember, it’s crucial to regularly inspect and maintain your Razor scooter’s brake system. Proper brake adjustment ensures your safety and enhances the longevity of your scooter. Revisit this guide whenever you need to adjust your Razor scooter’s brake, and enjoy a smooth and secure ride every time.
EASY! How To Adjust Electric Scooter Brake: Razor Ecosmart Metro, Don't Replace It, Fix It!!!!
Frequently Asked Questions
How do you adjust the brake on a Razor scooter?
To adjust the brake on a Razor scooter, follow these steps:
How do you tighten the brake on a Razor scooter?
To tighten the brake on a Razor scooter, locate the brake lever and the adjustment bolt. Turn the adjustment bolt clockwise to increase the brake tension until you achieve the desired tightness.
How do you loosen the brake on a Razor scooter?
To loosen the brake on a Razor scooter, locate the brake lever and the adjustment bolt. Turn the adjustment bolt counterclockwise to decrease the brake tension until the brake is loosened to your liking.
Why is my Razor scooter brake not working?
If your Razor scooter brake is not working, it could be due to several reasons. Check if the brake pads are worn out and if they need replacement. Additionally, ensure that the brake cable is properly connected and adjusted. If the issue persists, it is recommended to seek professional assistance for further inspection and repair.
What should I do if my Razor scooter brake is too loose?
If your Razor scooter brake is too loose and not providing adequate braking power, follow the steps to tighten the brake adjustment. If the issue persists, inspect the brake pads for wear and tear and consider replacing them if necessary. It is important to have a properly functioning brake for your safety while riding the scooter.
Can I adjust the brake on a Razor scooter myself?
Yes, you can adjust the brake on a Razor scooter yourself by following the manufacturer’s instructions and using the appropriate tools. It is recommended to refer to the user manual or the Razor website for specific instructions related to your scooter model. However, if you are uncertain or uncomfortable with performing the adjustment, it is advisable to consult a professional technician.
Final Thoughts
To adjust the brake on a Razor scooter, follow these simple steps: First, locate the brake adjustment knob or screw near the handlebar. Turn it clockwise to tighten or counterclockwise to loosen the brake. Test the brake by squeezing the lever to ensure it engages properly. If necessary, repeat the process until the desired brake tension is achieved. Regularly inspect and adjust the brake as needed to maintain optimal performance and safety. By knowing how to adjust the brake on a Razor scooter, you can ensure a smoother and safer riding experience.